Raspberry Pi PXE Kubernetes cluster
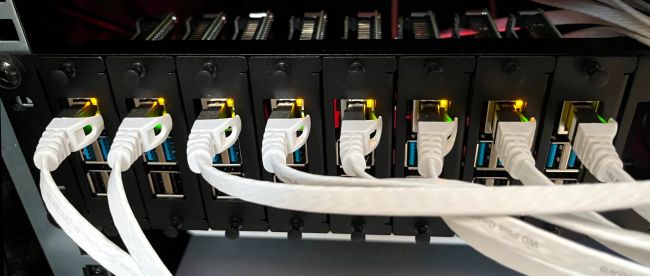
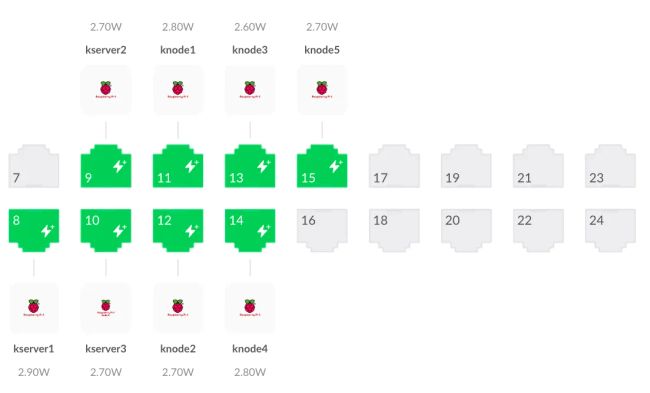
Here I’m going to line out how I am bootstrapping my homelab Raspberry Pi rig which runs a lightweight Kubernetes cluster with k3s for experimentation. I currently run eight Raspberry Pi 4 (3x 4 GB, 5x 8 GB) on Raspberry Pi OS Lite (64bit, Debian Bullseye).

The Raspberry Pis are connected to a Ubiquiti Switch Pro 24 PoE and powered over Ethernet each by a Waveshare PoE HAT (D).

At 2.8 watts these PoE HATs draw roughly half the current of an original Raspberry PoE HAT when idle. My goals for this cluster are
- The infrastructure is simple to maintain / upgrade
- The cluster is simple to tear down and build up from scratch to support experimentation
Create the system image
We want to boot via network to enable simple bootstrapping and snapshotting of the OS images. But you have to start somewhere. First we’re going to bootstrap the micro SD card, and then set up everything required for booting over the network.
Bootstrap the microSD card
I started by downloading Raspberry Pi Imager and configured a headless Raspberry Pi OS Lite system selecting Raspberry Pi OS Lite (64 bit), the SD card to write to, and configuring the following modifications:
- Hostname: kserver1
- SSH: yes (with password)
- Configure a username and strong password
- Adjust the language preferences to your liking
Setup network boot
There are lots of howtos on how to get Raspberry Pis to boot via network, and most depend heavily on the network environment they are operated within and the operating system they are run on. This journal is no different. I have put steps 1 to 6 into a bash script which streamlines my configuration and bootstrapping process. If this is your first time, and you want to get your hands dirty, I suggest you go through these steps manually. If not and you feel lucky (remember, this script is not widely tested on systems other than mine), go ahead and review the source code and learn about the usage before executing. To execute the script, log into the instance via ssh and run the following command.
sh -c "$(curl -sL https://raw.githubusercontent.com/krgr/raspberry-pi-pxe-bootstrap/main/install.sh)"After successful execution you can skip to step 7.
Step 1 - update system and disable wifi
If you ran the script above, you can skip to step 7. If you did not, log into the instance via ssh with the credentials you configured earlier and do a full system upgrade for good measure as well as install unattended upgrades, which makes sure security updates are installed automatically. We also install screen, which makes sense to install for most headless systems.
sudo apt update
apt list --upgradable
sudo apt full-upgrade
sudo apt install screen unattended-upgrades apt-config-auto-update
Optionally disable wifi completely if you don’t plan to use it by disabling wpa_supplicant and adding a corresponding entry to the boot config. A backup copy of the boot config will be created at /boot/config.txt.pxe.bak.
sudo systemctl disable wpa_supplicant
sudo sed -i.pxe.bak '/# Additional overlays and parameters are documented \/boot\/overlays\/README/a dtoverlay=disable-wifi' /boot/config.txt
Check if a reboot works and if you can still log in.
sudo rebootIf all goes well, you can go to the next step.
Step 2 - deactivate swap
Let’s perform some initial cleanup removing swap because we will not have a local file system and don’t want the system to swap out over the network. If we don’t have enough memory we want predictable failure modes.
sudo dphys-swapfile swapoff
sudo dphys-swapfile uninstall
sudo systemctl disable dphys-swapfile
After performing the commands above, free -h should show a total of 0B for swap.
               total        used        free      shared  buff/cache   available
Mem:           7.6Gi        80Mi       7.5Gi       0.0Ki        96Mi       7.4Gi
Swap:             0B          0B          0B
Step 3 - switch to PXE-compatible network stack
The pre-installed network configuration daemon dhcpcd does not play well with network booting, and struggles to gracefully take over control after the initial boot-time network setup. The default setup also does not play well with advanced domain name resolution in case you want to set up Tailscale or something similar. I use Tailscale a lot, so let’s upgrade our stack to systemd-networkd and systemd-resolveconf as suggested in a Tailscale blog post about The Sisyphean Task Of DNS Client Config on Linux. We can follow along Fernando Ceja’s great blog post explainig how to Switch from Network Manager to systemd-networkd. Instead of removing Network Manager, we are going to remove dhcpcd. Everything else is pretty similar.
First we are going to disable dhcpcd and enable systemd-networkd.
sudo systemctl stop dhcpcd
sudo systemctl disable dhcpcd
sudo systemctl enable systemd-networkd
Next we are going to enable systemd-resolved which is used by systemd-networkd for network name resolution.
sudo systemctl enable systemd-resolved
sudo systemctl start systemd-resolved
sudo rm /etc/resolv.conf
sudo ln -s /run/systemd/resolve/stub-resolv.conf /etc/resolv.conf
Now we need to create the network configuration. I want to use DHCP to initialize the network interface. Let’s see what interfaces networkctl gives us:
IDX LINK  TYPE     OPERATIONAL SETUP
  1 lo    loopback n/a         unmanaged
  2 eth0  ether    n/a         unmanaged
We need to configure eth0 so let’s create the corresponding network configuration file /etc/systemd/network/20-wired.network with the content below. The KeepConfiguration setting is important for a seamless handover during network boot. Setting this to yes ensures networkd will not drop static addresses and routes on starting up process, and will not drop addresses and routes on stopping the daemon. Even the addresses and routes provided by a DHCP server will never be dropped, even if the DHCP lease expires as the root filesystem relies on this connection.
[Match]
Name=eth0

[Network]
DHCP=yes
KeepConfiguration=yes
As a last step we need to restart the service. We’ll also remove any packages that are not needed anymore.
sudo systemctl restart systemd-networkd
sudo apt remove openresolv network-manager
sudo apt autoremove
A quick networkctl will show us if our interface is now configured.
IDX LINK  TYPE     OPERATIONAL SETUP
  1 lo    loopback carrier     unmanaged
  2 eth0  ether    routable    configured
Optional: install Tailscale
I like to use Tailscale for simple ssh access via VPN. We’re going to install it according to the official guidelines for Debian Bullseye (for Raspberry Pi) and turn on ssh.
sudo apt install apt-transport-https
curl -fsSL https://pkgs.tailscale.com/stable/raspbian/bullseye.noarmor.gpg | sudo tee /usr/share/keyrings/tailscale-archive-keyring.gpg > /dev/null
curl -fsSL https://pkgs.tailscale.com/stable/raspbian/bullseye.tailscale-keyring.list | sudo tee /etc/apt/sources.list.d/tailscale.list
sudo apt update
sudo apt install tailscale
sudo tailscale up --ssh
Step 4 - create remote filesystems
This step assumes you have a NAS setup with a working NFS setup and tftpboot capability. My NAS is at 192.168.133.21 and you need to replace that IP with the IP of your NAS. Parts of this journal are based on Rob Fergusons’s great tutorial on How to PXE-boot your RPi. I found that earlier problems related to the inability to boot via NFS newer than NFSv2 do not seem to exist anymore, so luckily we don’t have to pay attention to NFS versions and can go with the newest we have available. The Synology RackStation® RS1221+ with DSM 7.1 which I currently use as my NAS offers NFSv4.1. Similar to Rob’s setup I have created the shared folders rpi-pxe which holds each Raspberry Pi’s root filesystem in a separate subfolder named after the Pi’s respective hostname, and rpi-tftpboot which holds the universal Raspberry Pi bootcode, and each Raspberry Pi’s specific boot files in a subfolder named after the Pi’s respective serial number.
Step 4.1 - create the remote root filesystem
To create the remote root filesystem folder you can check your hostname via hostname. In our case the hostname is kserver1. We mount 192.168.133.21:/volume1/rpi-pxe (remote) to /nfs/rpi-pxe (local), and copy the root filesystem with rsync to /nfs/rpi-pxe/kserver1.
sudo mkdir -p /nfs/rpi-pxe
sudo mount -t nfs -O proto=tcp,port=2049,rw,all_squash,anonuid=1001,anongid=1001 192.168.133.21:/volume1/rpi-pxe /nfs/rpi-pxe -vvv
sudo mkdir -p /nfs/rpi-pxe/`hostname`
sudo rsync -xa --delete --info=progress2 --exclude /nfs / /nfs/rpi-pxe/`hostname`/
Step 4.2 - create the remote boot filesystem
To prepare the remote boot files folder for the initial betwork boot step, create a different mount point, mount the shared boot folder, and copy over the universal Raspberry Pi bootcode.bin file first.
sudo mkdir -p /nfs/rpi-tftpboot
sudo mount -t nfs -O proto=tcp,port=2049,rw,all_squash,anonuid=1001,anongid=1001 192.168.133.21:/volume1/rpi-tftpboot /nfs/rpi-tftpboot -vvv
sudo cp /boot/bootcode.bin /nfs/rpi-tftpboot/
We are going to use the Raspberry Pi’s hardware serial number to map each Raspberry Pi to their corresponding boot folder on the network storage. Let’s create an alias to retrieve this number with one simple command for convenience. We’ll need the serial command a few times and want it to persist over reboots, so we’ll add it to .bash_aliases.
echo "alias serial='vcgencmd otp_dump | grep 28: | sed s/.*://g'" >> .bash_aliases
source .bashrc
serial
The serial number should be something like 9edf3541. Now create a folder named after the serial number and copy all boot files over to that folder.
sudo mkdir -p /nfs/rpi-tftpboot/`serial`
sudo rsync -xa --delete --info=progress2 /boot/* /nfs/rpi-tftpboot/`serial`/
Step 5 - Configure boot options
We need to make sure the boot folder is mounted during startup, so we remove the previous boot and root filsesystem entries, and add an entry to the filesystem table /etc/fstab on the remote filesystem. Don’t forget to adapt the IP to your NAS.
sudo sed -i.pxe.bak ' /boot \| \/ /d' /nfs/`hostname`/etc/fstab
echo "192.168.133.21:/volume1/rpi-tftpboot/`serial` /boot nfs defaults,proto=tcp 0 0" | sudo tee -a /nfs/`hostname`/etc/fstab
cat vi /nfs/`hostname`/etc/fstab
The file system table must only contain these two entries with the NAS IP and Raspberry Pi serial number adapted to your setup and should look like this:
proc            /proc           proc    defaults          0       0
192.168.133.21:/volume1/rpi-tftpboot/9edf3541 /boot nfs defaults,proto=tcp 0 0
Now configure the kernel options to boot from network and specify the NFS root filesystem by editing cmdline.txt in the boot folder of the remote filesystem. Since we want to run Kubernetes at some point in time, let’s also add cgroup related configurations, and make sure we use the most modern NFS protocol version available, which is 4.1 in my case with Synology as a server. This is important as the overlay filesystem needed by k3s will otherwise not work and k3s would fail to start.
echo "console=serial0,115200 console=tty1 root=/dev/nfs nfsroot=192.168.133.21:/volume1/rpi-pxe/`hostname`,vers=4.1 rw ip=dhcp elevator=deadline rootwait cgroup_memory=1 cgroup_enable=memory" | sudo tee /nfs/rpi-tftpboot/`serial`/cmdline.txt
cat /nfs/rpi-tftpboot/`serial`/cmdline.txt
It should read as follows with your respective NAS IP and hostname.
console=serial0,115200 console=tty1 root=/dev/nfs nfsroot=192.168.133.21:/volume1/rpi-pxe/kserver1,vers=4.1 rw ip=dhcp elevator=deadline rootwait cgroup_memory=1 cgroup_enable=memoryStep 6 - Configure the EEPROM firmware
Find the latest version of the Rasperry Pi’s EEPROM firmware, and copy it temporaraily to your home directory to include the netwoork boot options.
ls -al /lib/firmware/raspberrypi/bootloader/stable/
sudo cp /lib/firmware/raspberrypi/bootloader/stable/pieeprom-2022-07-22.bin pieeprom.bin
sudo vi bootconf.txt
Update bootconf.txt as follows and make sure to replace the TFTP_IP with the IP to your NAS. I point directly to the TFTP server IP instead of relying on DHCP, because DHCP is done by my router, and the DHCP proxying from the router to Synology RackStation’s DHCP server does not seem to work with TFTP.
[all]
BOOT_UART=0
WAKE_ON_GPIO=1
POWER_OFF_ON_HALT=0
DHCP_TIMEOUT=45000
DHCP_REQ_TIMEOUT=4000
TFTP_FILE_TIMEOUT=30000
TFTP_IP=192.168.133.21
TFTP_PREFIX=0
ENABLE_SELF_UPDATE=1
DISABLE_HDMI=0
BOOT_ORDER=0x21
SD_BOOT_MAX_RETRIES=3
NET_BOOT_MAX_RETRIES=5
With the BOOT_ORDER set to 0x21 the Raspberry Pi will try to boot from a microSD card, and then from network. With this configuration we create the new EEPROM binary, update the EEPROM on the Raspberry Pi, and reboot with the microSD card still inserted.
sudo rpi-eeprom-config --out pieeprom-new.bin --config bootconf.txt pieeprom.bin
sudo rpi-eeprom-update -d -f ./pieeprom-new.bin
sudo reboot
Step 7 - Boot over network
After the reboot check the boot configuration values are reflecting the ones you set in the step above.
vcgencmd bootloader_configIf all looks good, you need to finally enable PXE boot on your NAS, point the boot loader to the universal bootcode.bin at the base of the rpi-tftpboot folder, and halt the Raspberry Pi.
sudo haltIn order to boot from network next, turn off the power (e.g. by unplugging the PoE network cable if your Raspberry Pi is powered over ethernet), remove the microSD card, and turn the power back on. Do not worry, you will still be able to boot from the microSD card in case something is off with your network boot configuration by plugging the microSD card back in and rebooting.
You can check your filesystems via df or findmnt.
Kubernetes preparation
To be continued…